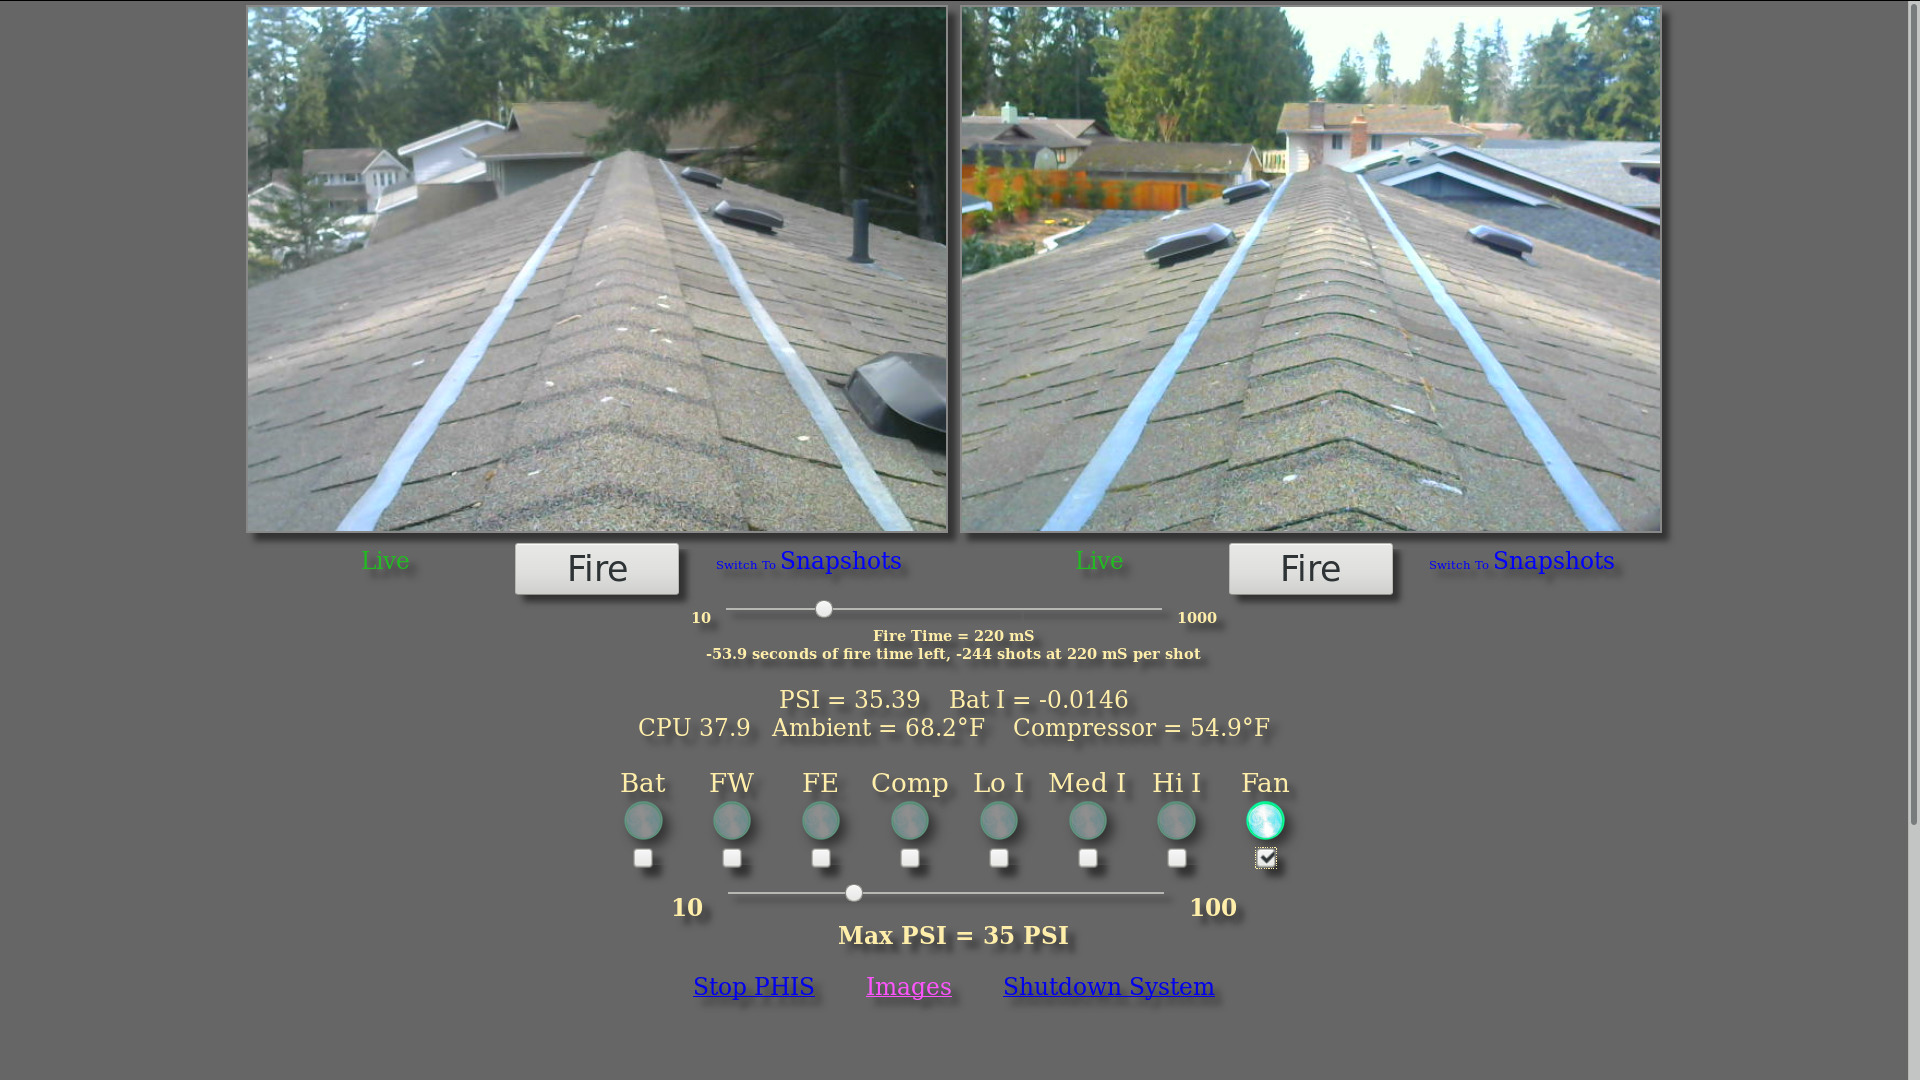
 Web interface showing both views, system status and controls, Green light indicates fan is on
The first generation CrowGun was easy to make and worked but had several flaws: the battery-powered squirt gun's batteries ran down and the harsh winter environment tended to corrode things. Also, the alchohol I added as antifreeze attacked the plastic of the gun's innards. Perhaps the worst limitation was that only one end of the roof was covered and the crows quickly learned to go pound their peanuts open at the other end of the house. (At least that was not over the bedroom!) This second generation addresses some of those flaws. It is WAY more complex and WWAAAYYY more expensive, and a SHITLOAD MORE WORK to build, but the fun of figuring it all out and the satisfaction of soaking one of those black bastards makes it easily worth the trouble.
First, it has a half gallon tank to hold the "ammunition" and a compressor (12V motorcycle tire pump) to pressurize the tank from the top. Liquid goes out the bottom into a tee that feeds two solenoid valves which are connected via high pressure hose to respective nozzels. When I initially shopped for a tank, I wanted to get stainless but the only stainless tanks available at the time were industrial high grade devices for pneumatics and/or medical/food service containers and were several hundred dollars; WAY too much. So I settled for a steel tank designed for air horns and had to use antifreeze (pet-safe) for the corrosion inhibitors. Works ok, but I've since found a stainless tank and will be using that in Gen 3.
The whole thing is controlled by a Raspberry Pi. This was my first Pi project. Fun little computer! I used a Pi Zero to keep the watts to a minum. It's still a full-blown Linux OS on a tiny board that fits in a shirt pocket. The Zero didn't have WiFi (at the time) so I added a WiFi dongle to the 12V powered USB hub that also supplies power to the two cameras. I used Logitech C270's for their high quality and low price for an h264-enabled camera. This hardware compression offloads the work of compressing two streams from mjpeg-streamer (the app that streams the two images over WiFi). Even with two streams, top shows %CPU at only 17%
The entire system runs on a 5A 12V brick. Running the compressor, however, takes more amps (I think I measured about 7A with light load) so I added a 12V motorcycle battery to run it. To charge the 12V battery, however, takes 13.6V, so I modifed the brick by popping the glued shell open on its seams and reverse engineering the circuit. By adding the right value resistor in parallel with one of the two in the feedback divider, I adjusted the output to almost exactly 13.6V. When I click the "Comp" checkbox (see first image, below, of the web interface), it closes a relay that connects the battery to the compressor. When the PSI reaches whatever the "Max PSI" is set to, the relay is opened. Then, another relay closes to connect the 13.6V supply to the battery. Charging current is monitored until it drops to near zero and then that relay is opened.
I added an Adafruit ADS1115 4-Channel ADC to read the pressure sensor, the charging current, the compressor temperature and the temperature inside the electronics box. Temperature sensors are small, 3-leg 5V-in-Deg-C-out sensors. I also added two 4-relay boards, giving me 8 relays to control the battery charging on/off, Fire West Valve, Fire East Valve, Compressor, Lo, Med and Hi battery charging (three different current limiting resistors), and a fan.
The first image, below, shows the web interface that is served by the Pi. We can switch between snapshot and live modes. Snapshot mode saves bandwidth by just taking a snapshot once every 2 seconds vs a video stream. When we see a crow we switch to Live and watch as the bastard flys away. Just below the Live/Snapshot links is a slider control that defines the mS the valve is left open when the Fire button is clicked. The image shows how my algorithm for calculating the remaining ammunition is a bit flawed (should have run out 54 seconds worth of fire time ago). Below that is current system status with PSI, battery charing current (zero is a bit off), CPU Deg C, Ambient temperature in the electronics box and compressor temperature (which is the temperature inside the house most of the time).
Relay controls are check boxes with green "lights" over them that, when lit, indicate the relay is energized. When the compressor is started by closing the Comp relay, a background thread is started that keeps reading the PSI with only minor delay between readings and opens the relay when the Max PSI setting is reached. Then, before exiting, the background thread fires off another background thread that connects the battery to the supply voltage and monitors the charging current until it drops to zero, then disconnects the charging relay and exits.
When developing the individual routines for reading temperature, charing the battery, opening and closing relays, etc, everything worked great. As the system matured, I started logging all the parameters once every few minutes. I also started working on the web interface that uses XMLHttpRequest calls to update the display. It seemed the logging was interfering with the web interface and relays were not opening or closing when they should, Fire buttons were being ignored and the compressor was not shutting off properly (very serious, that one). It didn't take very long before I realized that the libraries for reading from the ADC are not thread-safe and all the different things going on in the multi-tasking Linux computer were interfering with each other. To solve this problem, I developed the PHIS - the Pi Hardware Interface Server.
The PHIS is probably the most significant thing I did in the software development of the CrowGun. It listens for http requests, just like a web server, and won't perform another action until the one it's working on is done. Most of the tasks are short, so it's not a problem. The couple that take time (running the compressor until PSI is right or charging the battery) are handled in background threads. Even those threads get their readings from the PHIS! The main thread doesn't know or care where the reqest for a reading comes from and it takes a reading for the background thread via http requests, just like it does for the browser on my smart phone or PC. The PHIS is a single process that gives me complete control over synchronizing interfaces with the hardware.
One other thing I might mention is the "Images" link at the bottom of the web interface. Each time a Fire button is clicked, the Pi saves a snapshot from the stream just before opening the valve. What this does is save a picture of a crow. Then, after the crow is gone, I click on the stream to capture an image of the (almost) exact same image, but without the crow. What this is doing is amassing a collection of pictures of crows that can be used to teach CV artificial intelligence what a crow looks like. Eventually, I hope to have an automated system that blasts the bastards before they wake me up!
Automated crow detection is one feature being saved for the third generation. I am currently working on a turret system that will give me 360 deg coverage of the entire roof and let me aim the nozzel up and down. Too many shots, now, just scare them away and, without any REAL consequences, they just come right back. Soon, I plan on deploying the turret and the stainless tank. Together, it will let me shoot them with something like rubbing alcohol that will irritate them and I won't miss!
Each small thumbnail, below, is a link to the full size image.
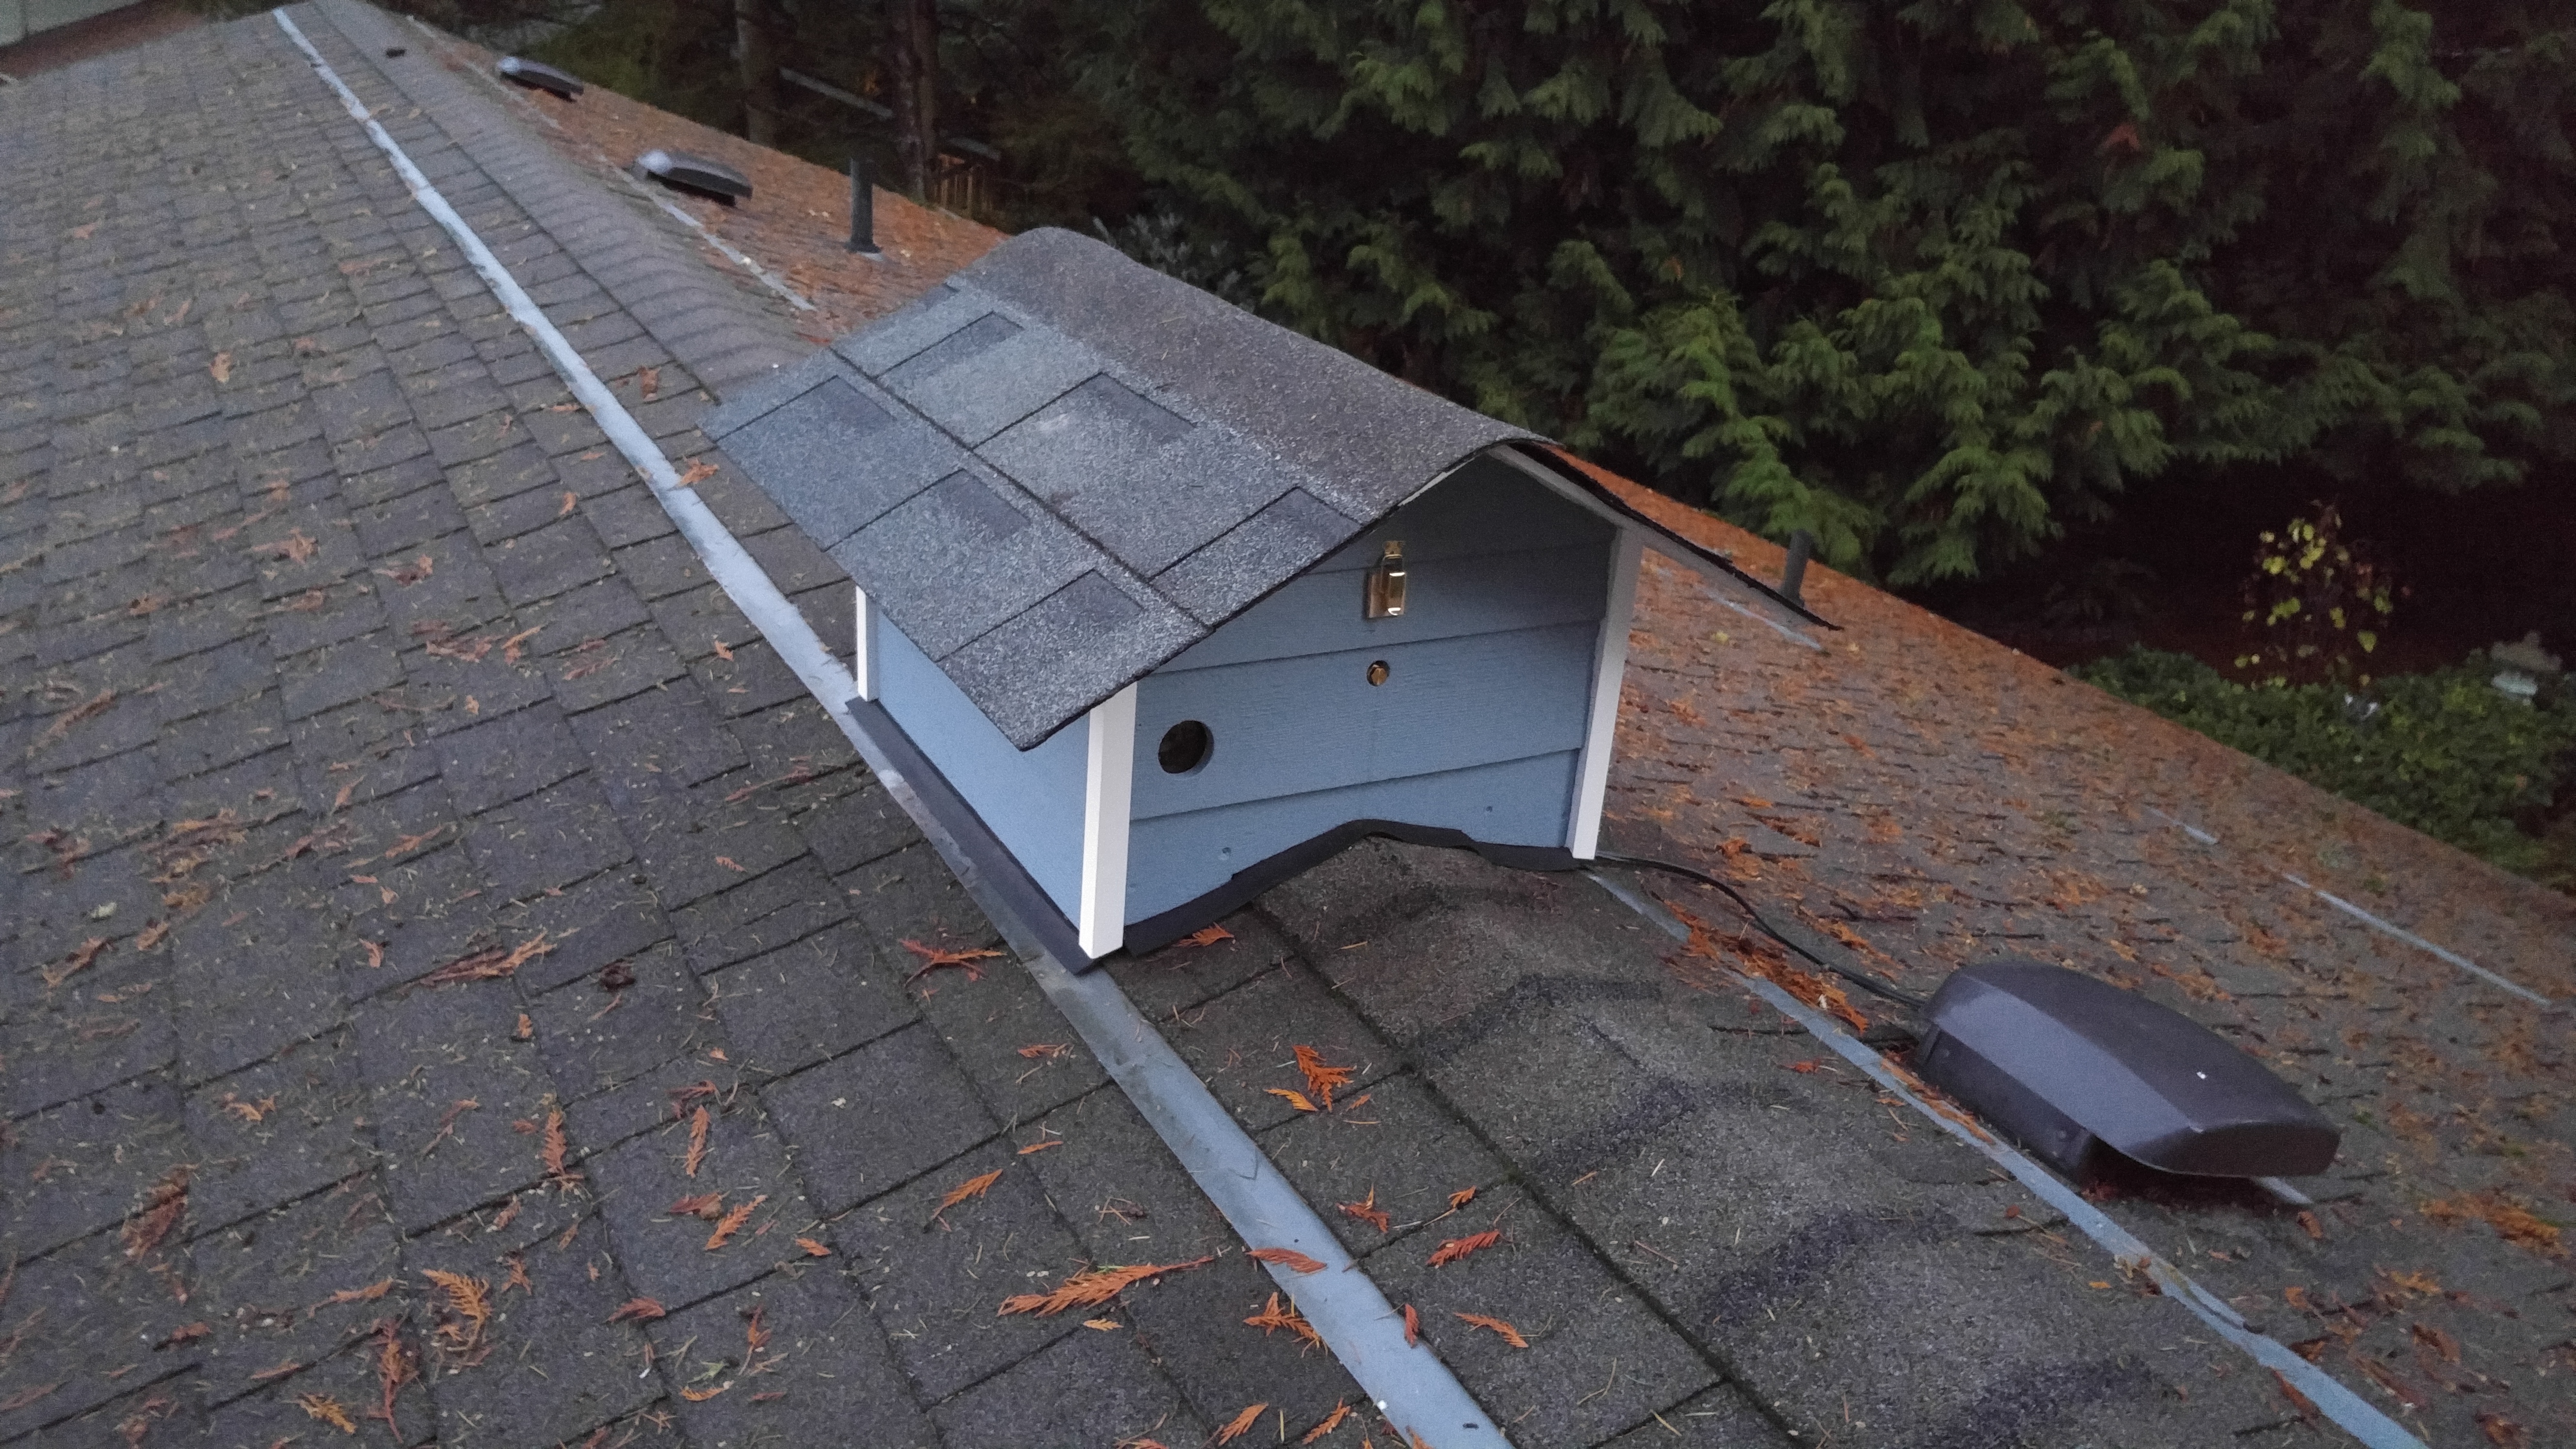 First deployment on the roof
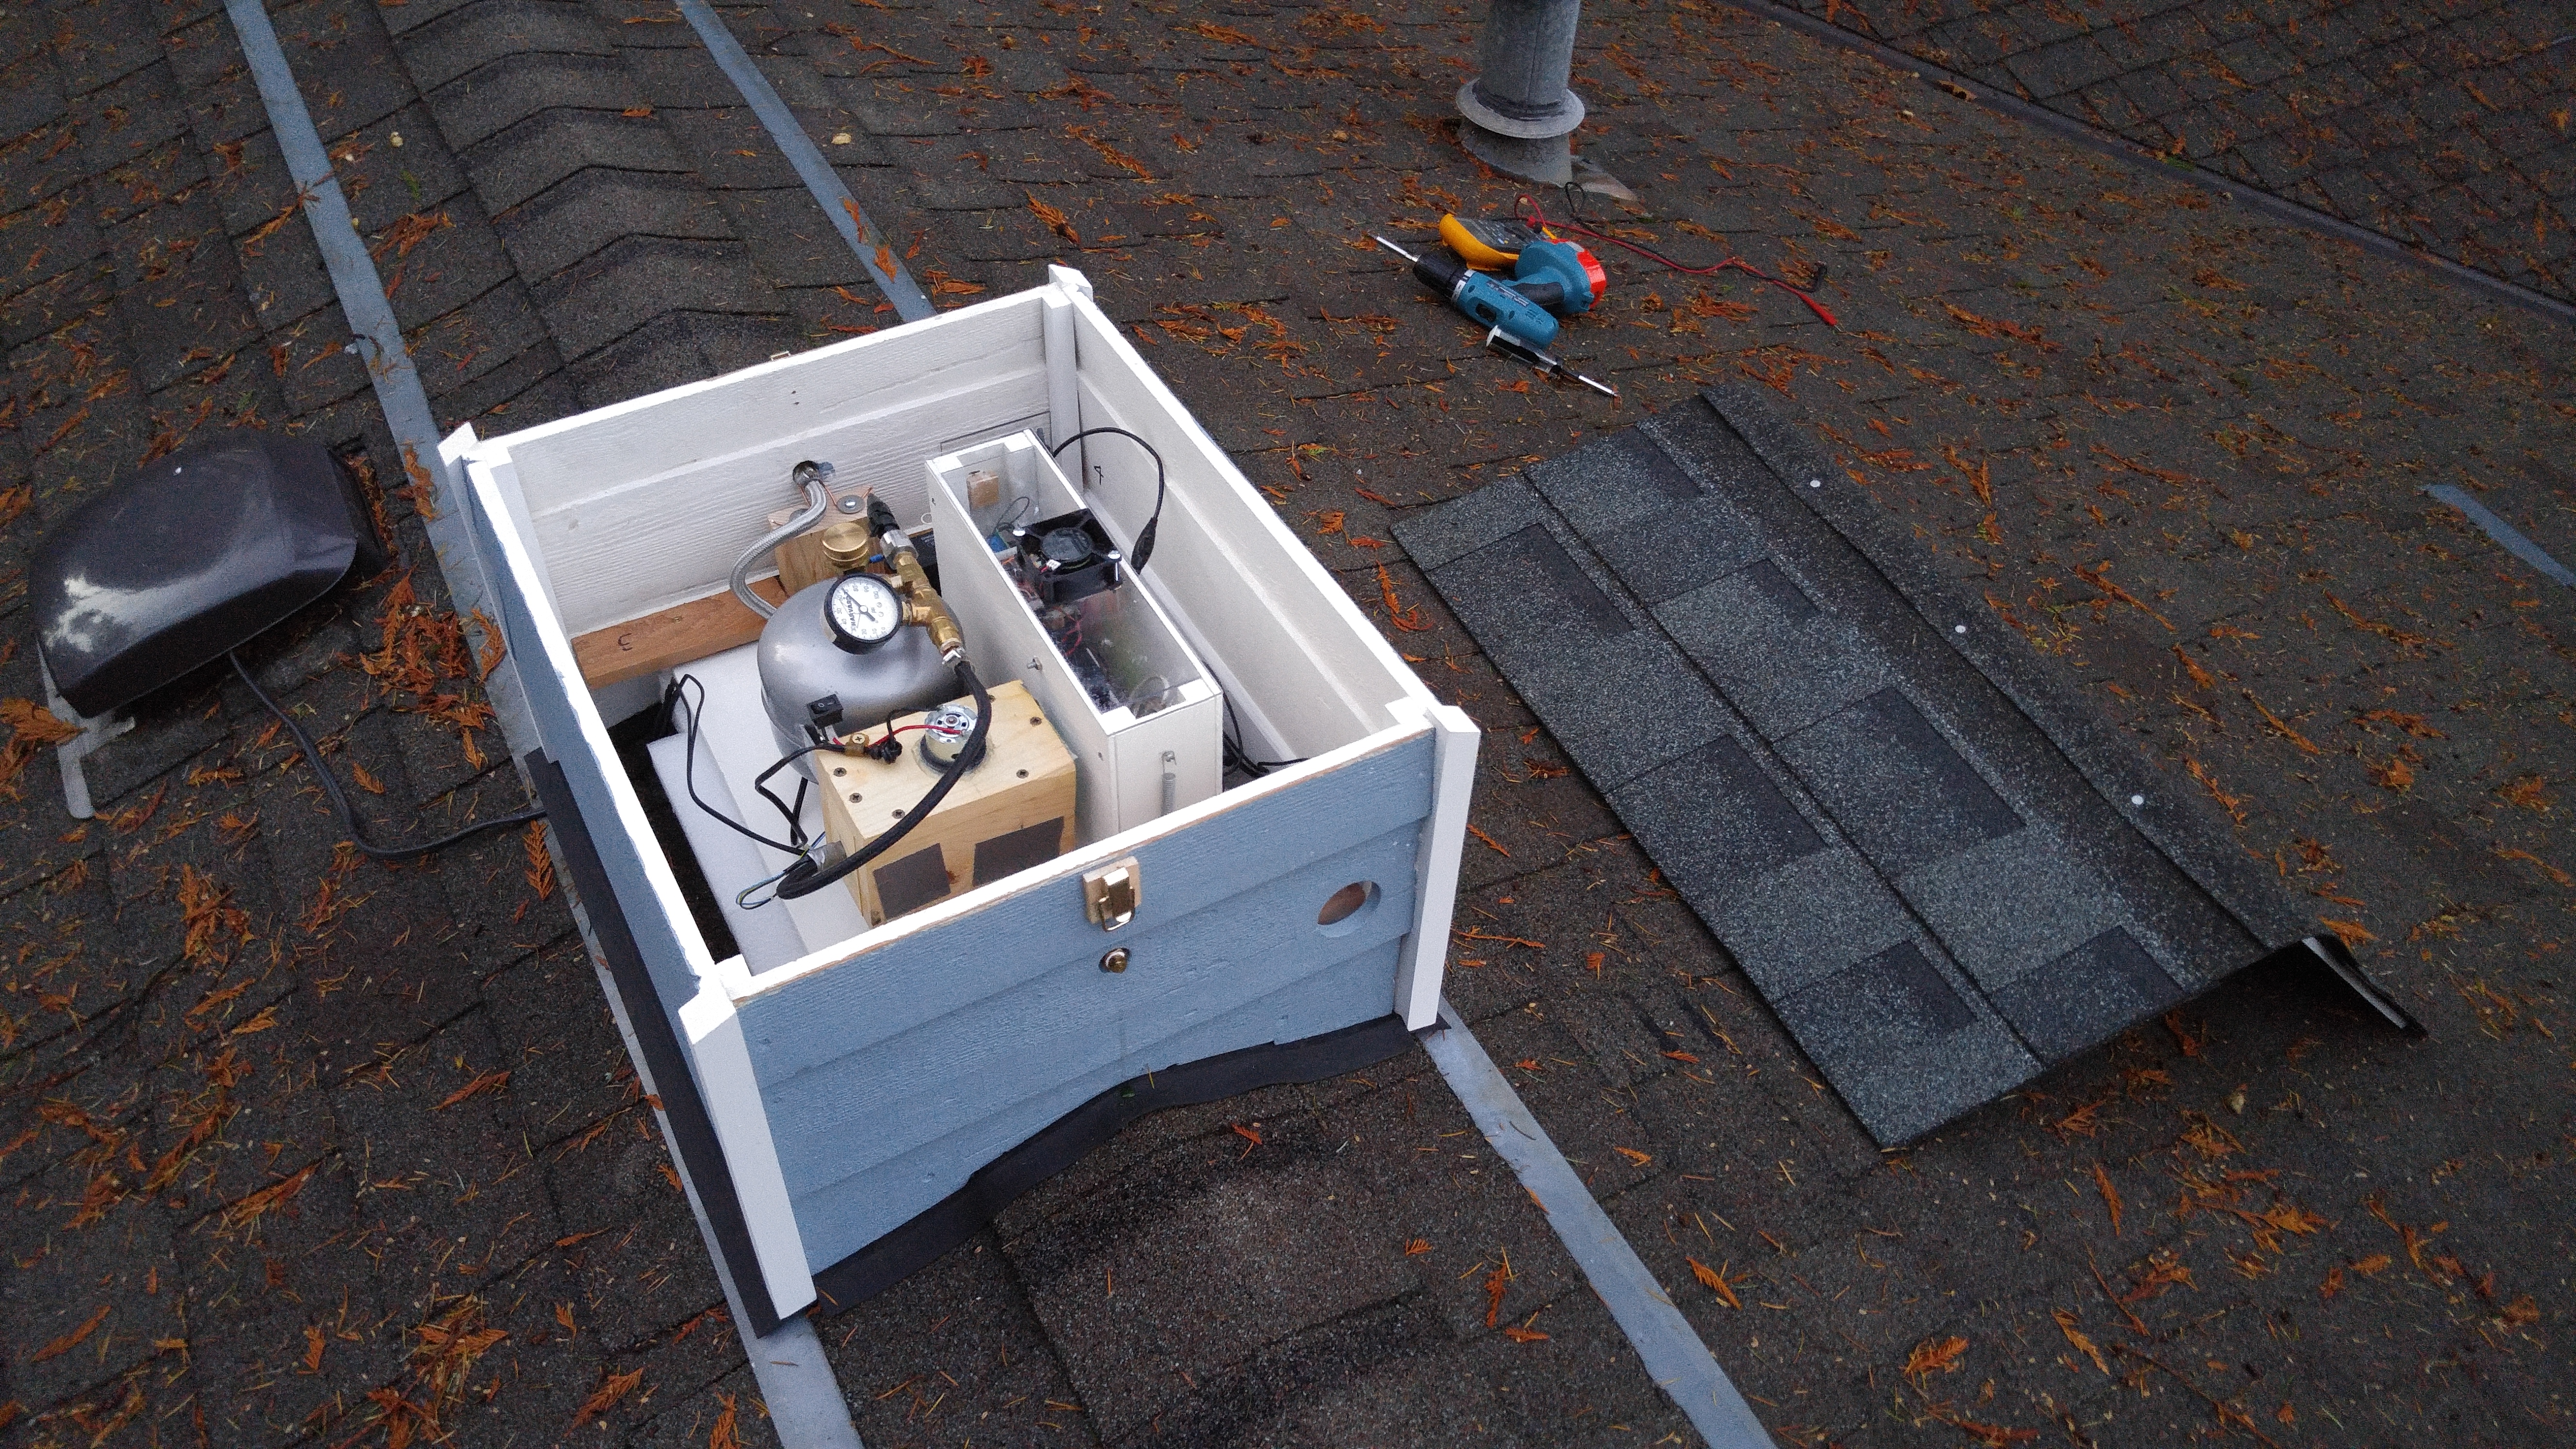 System is 3 pieces: box base, gun assy and box top, final assembly at time of deployment on the roof of our house
 The first assembly on the roof
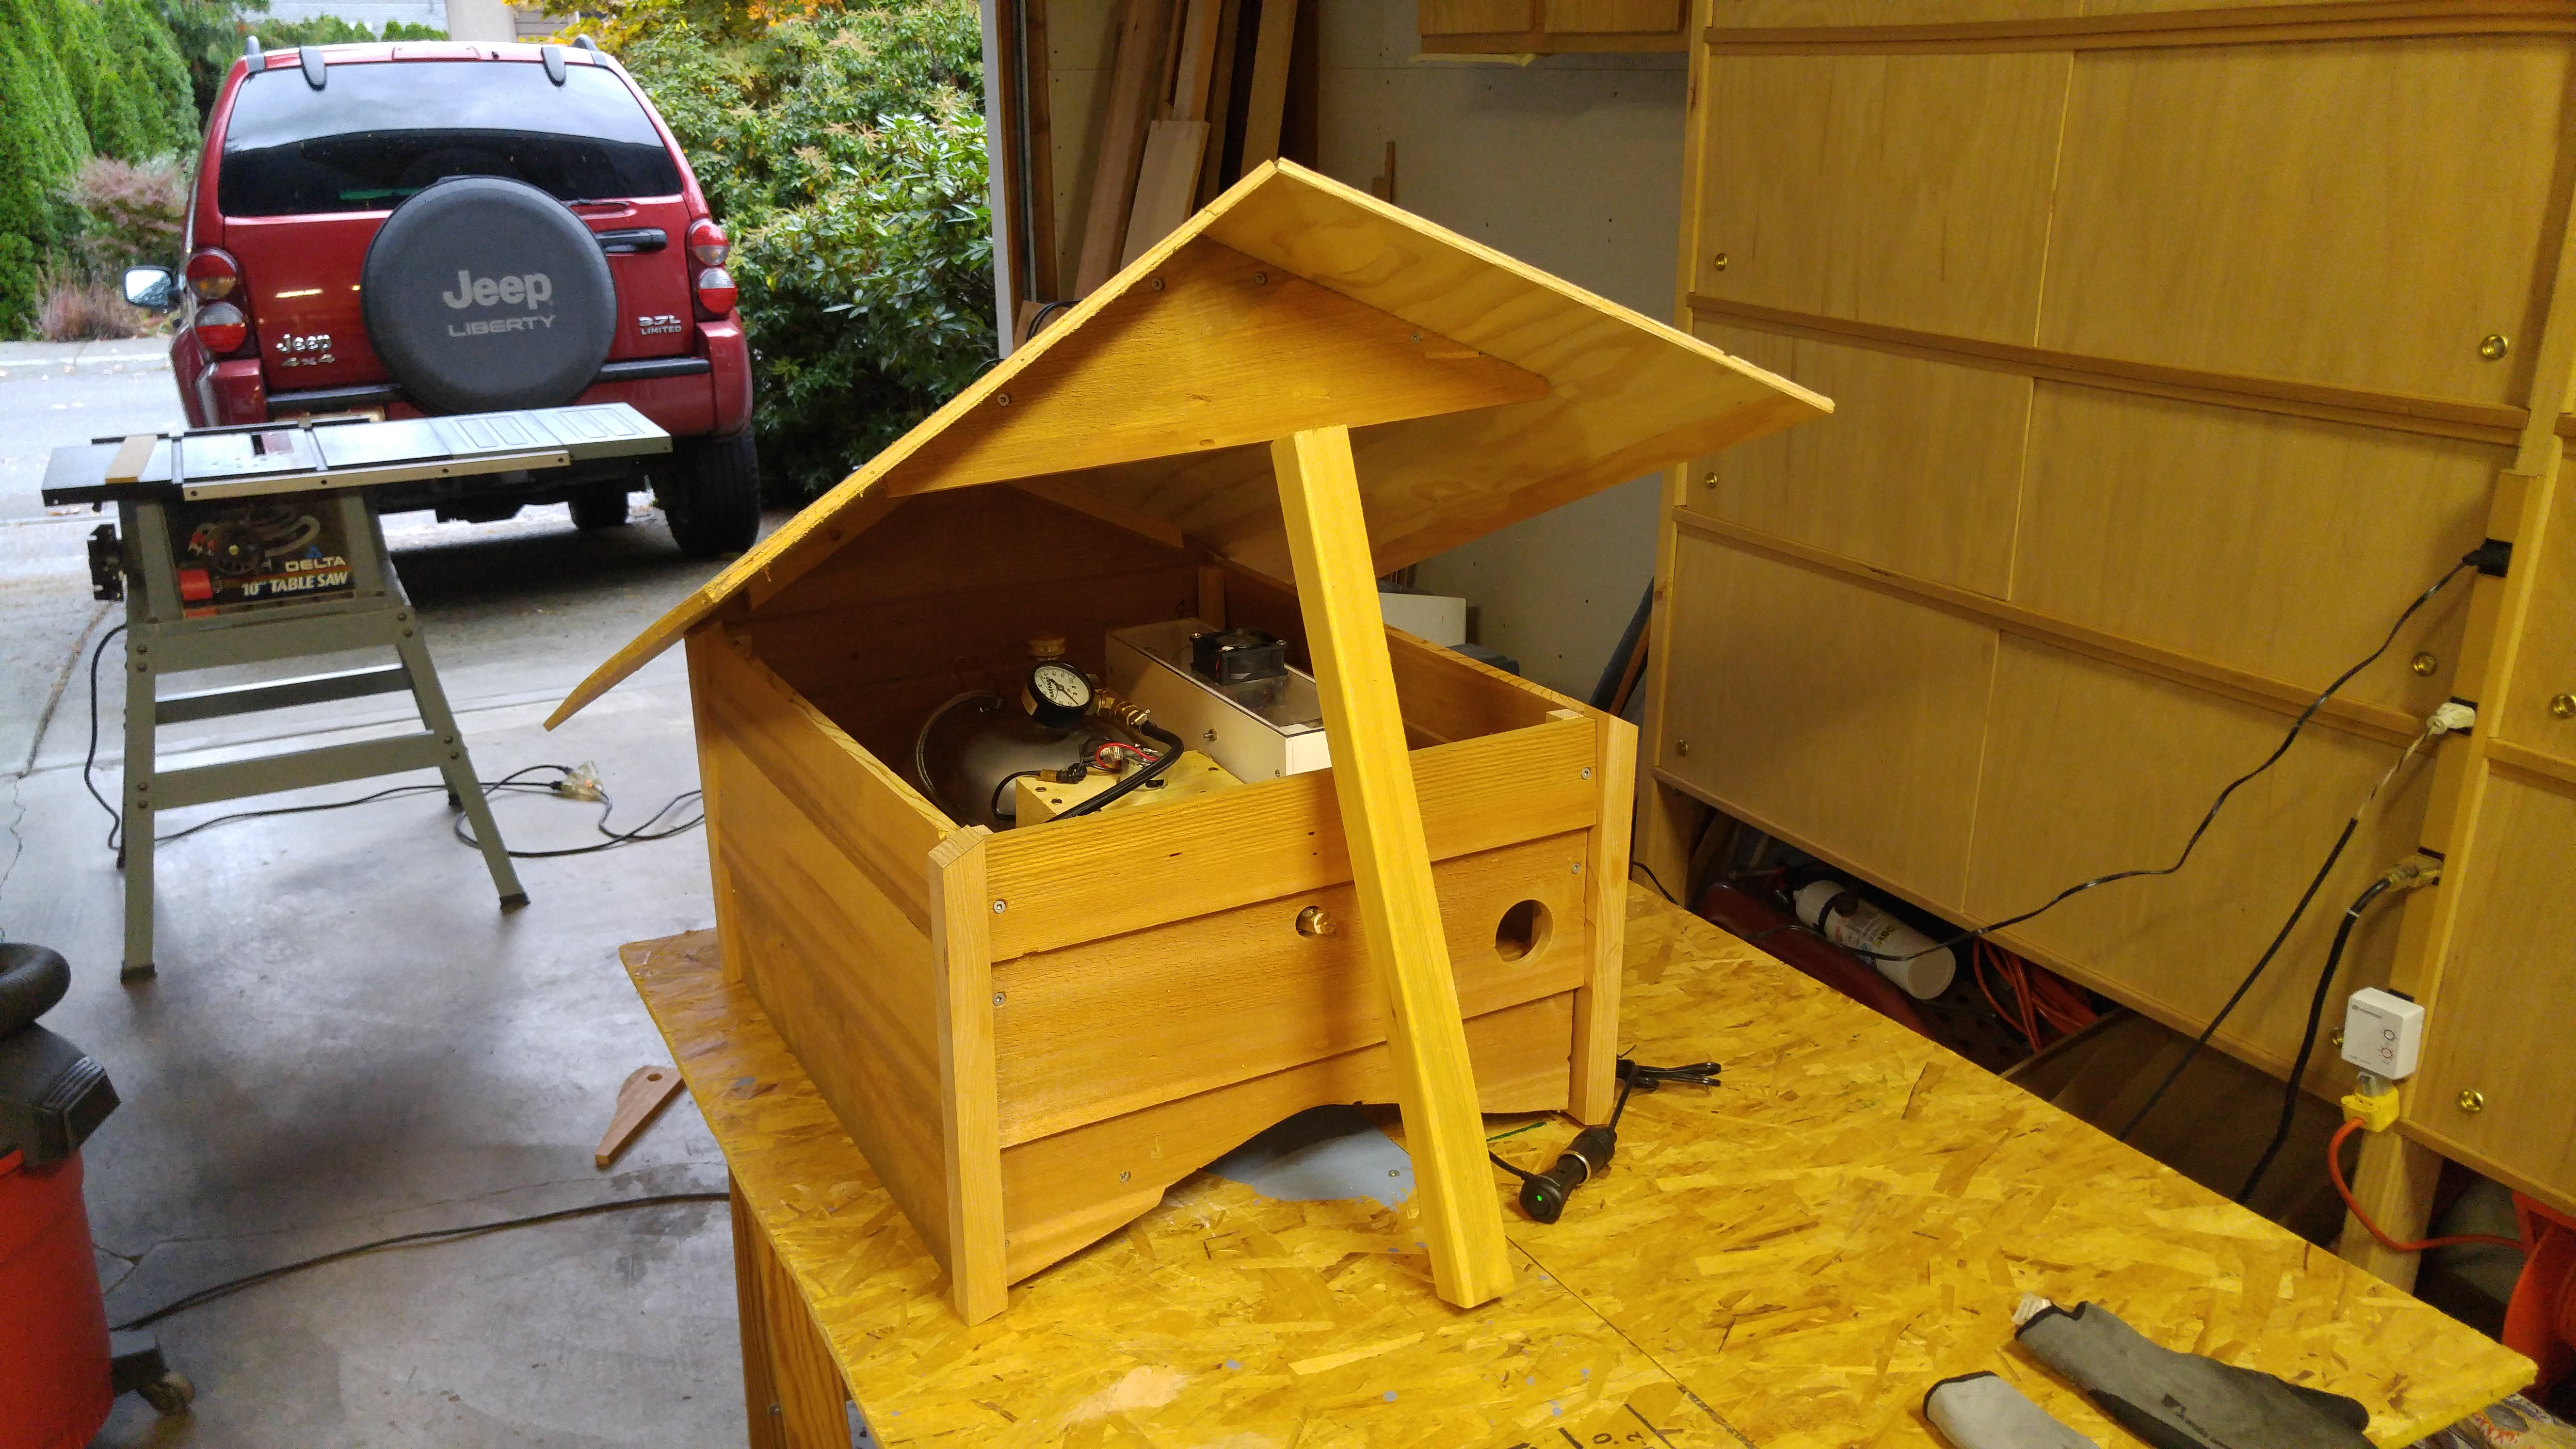 The first test assembly in the garage
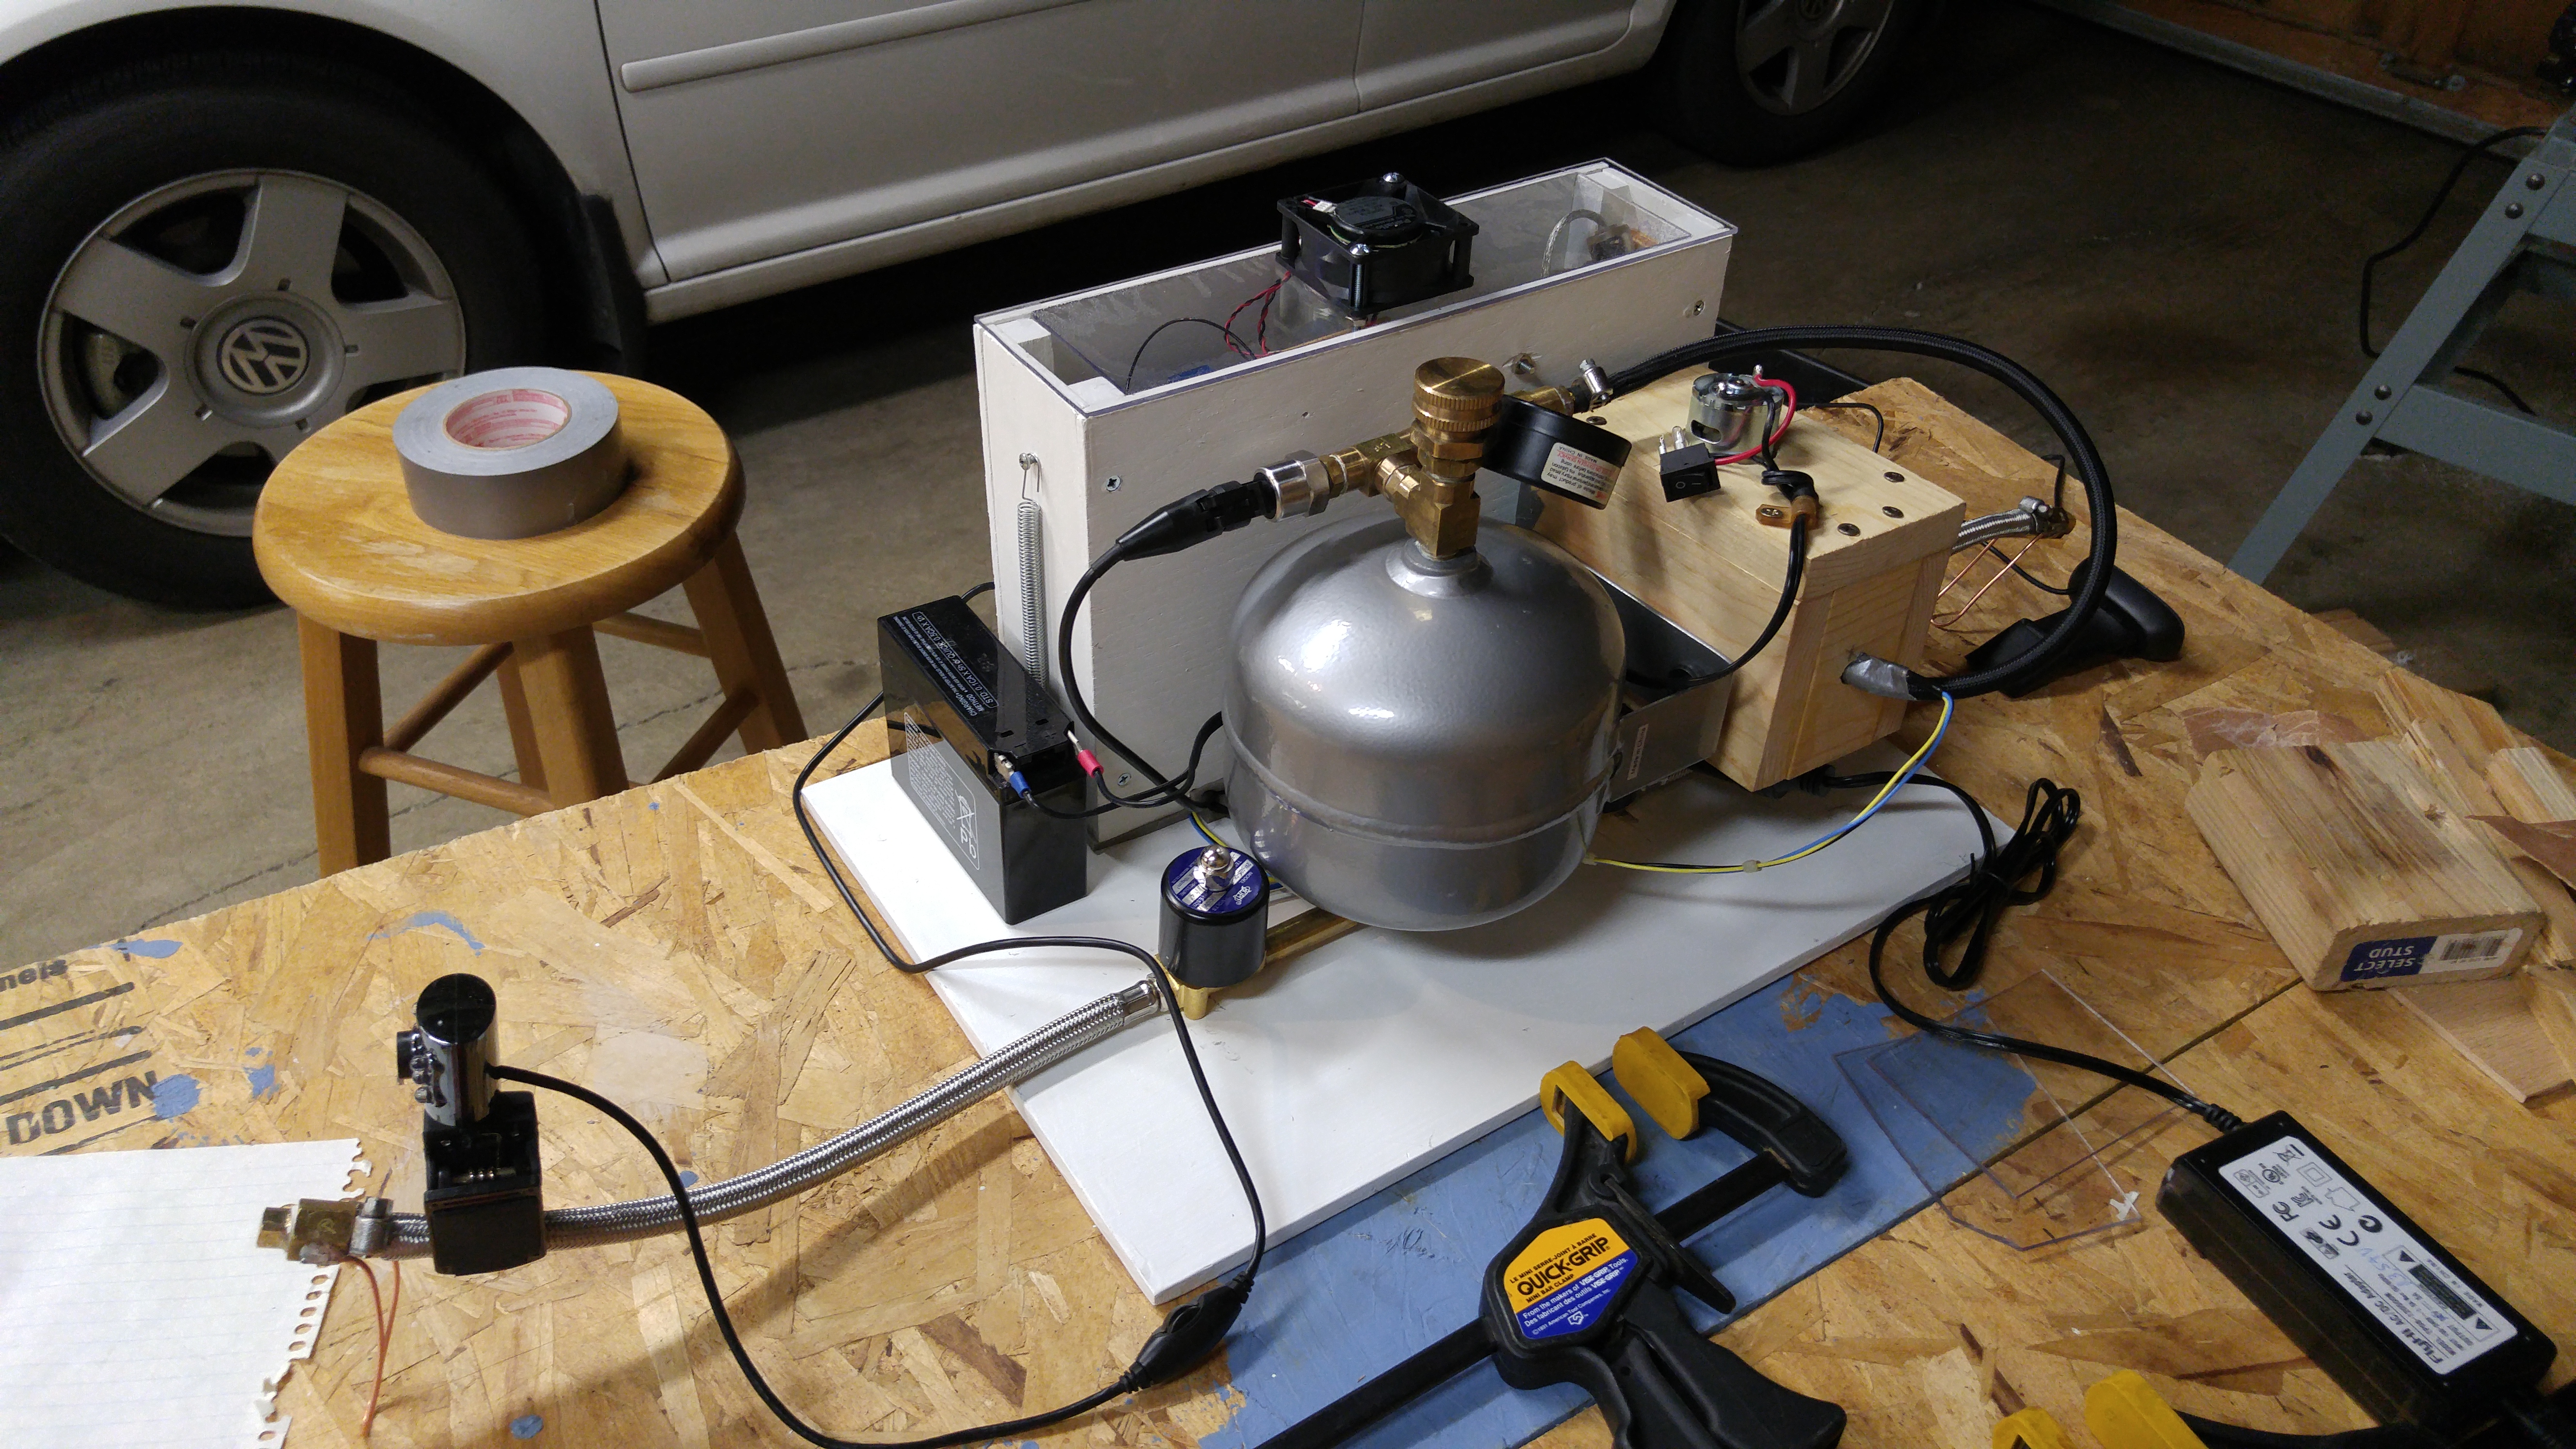 The gun assembly, with fan installed on the electronics box, tank/compressor/valve assy and battery
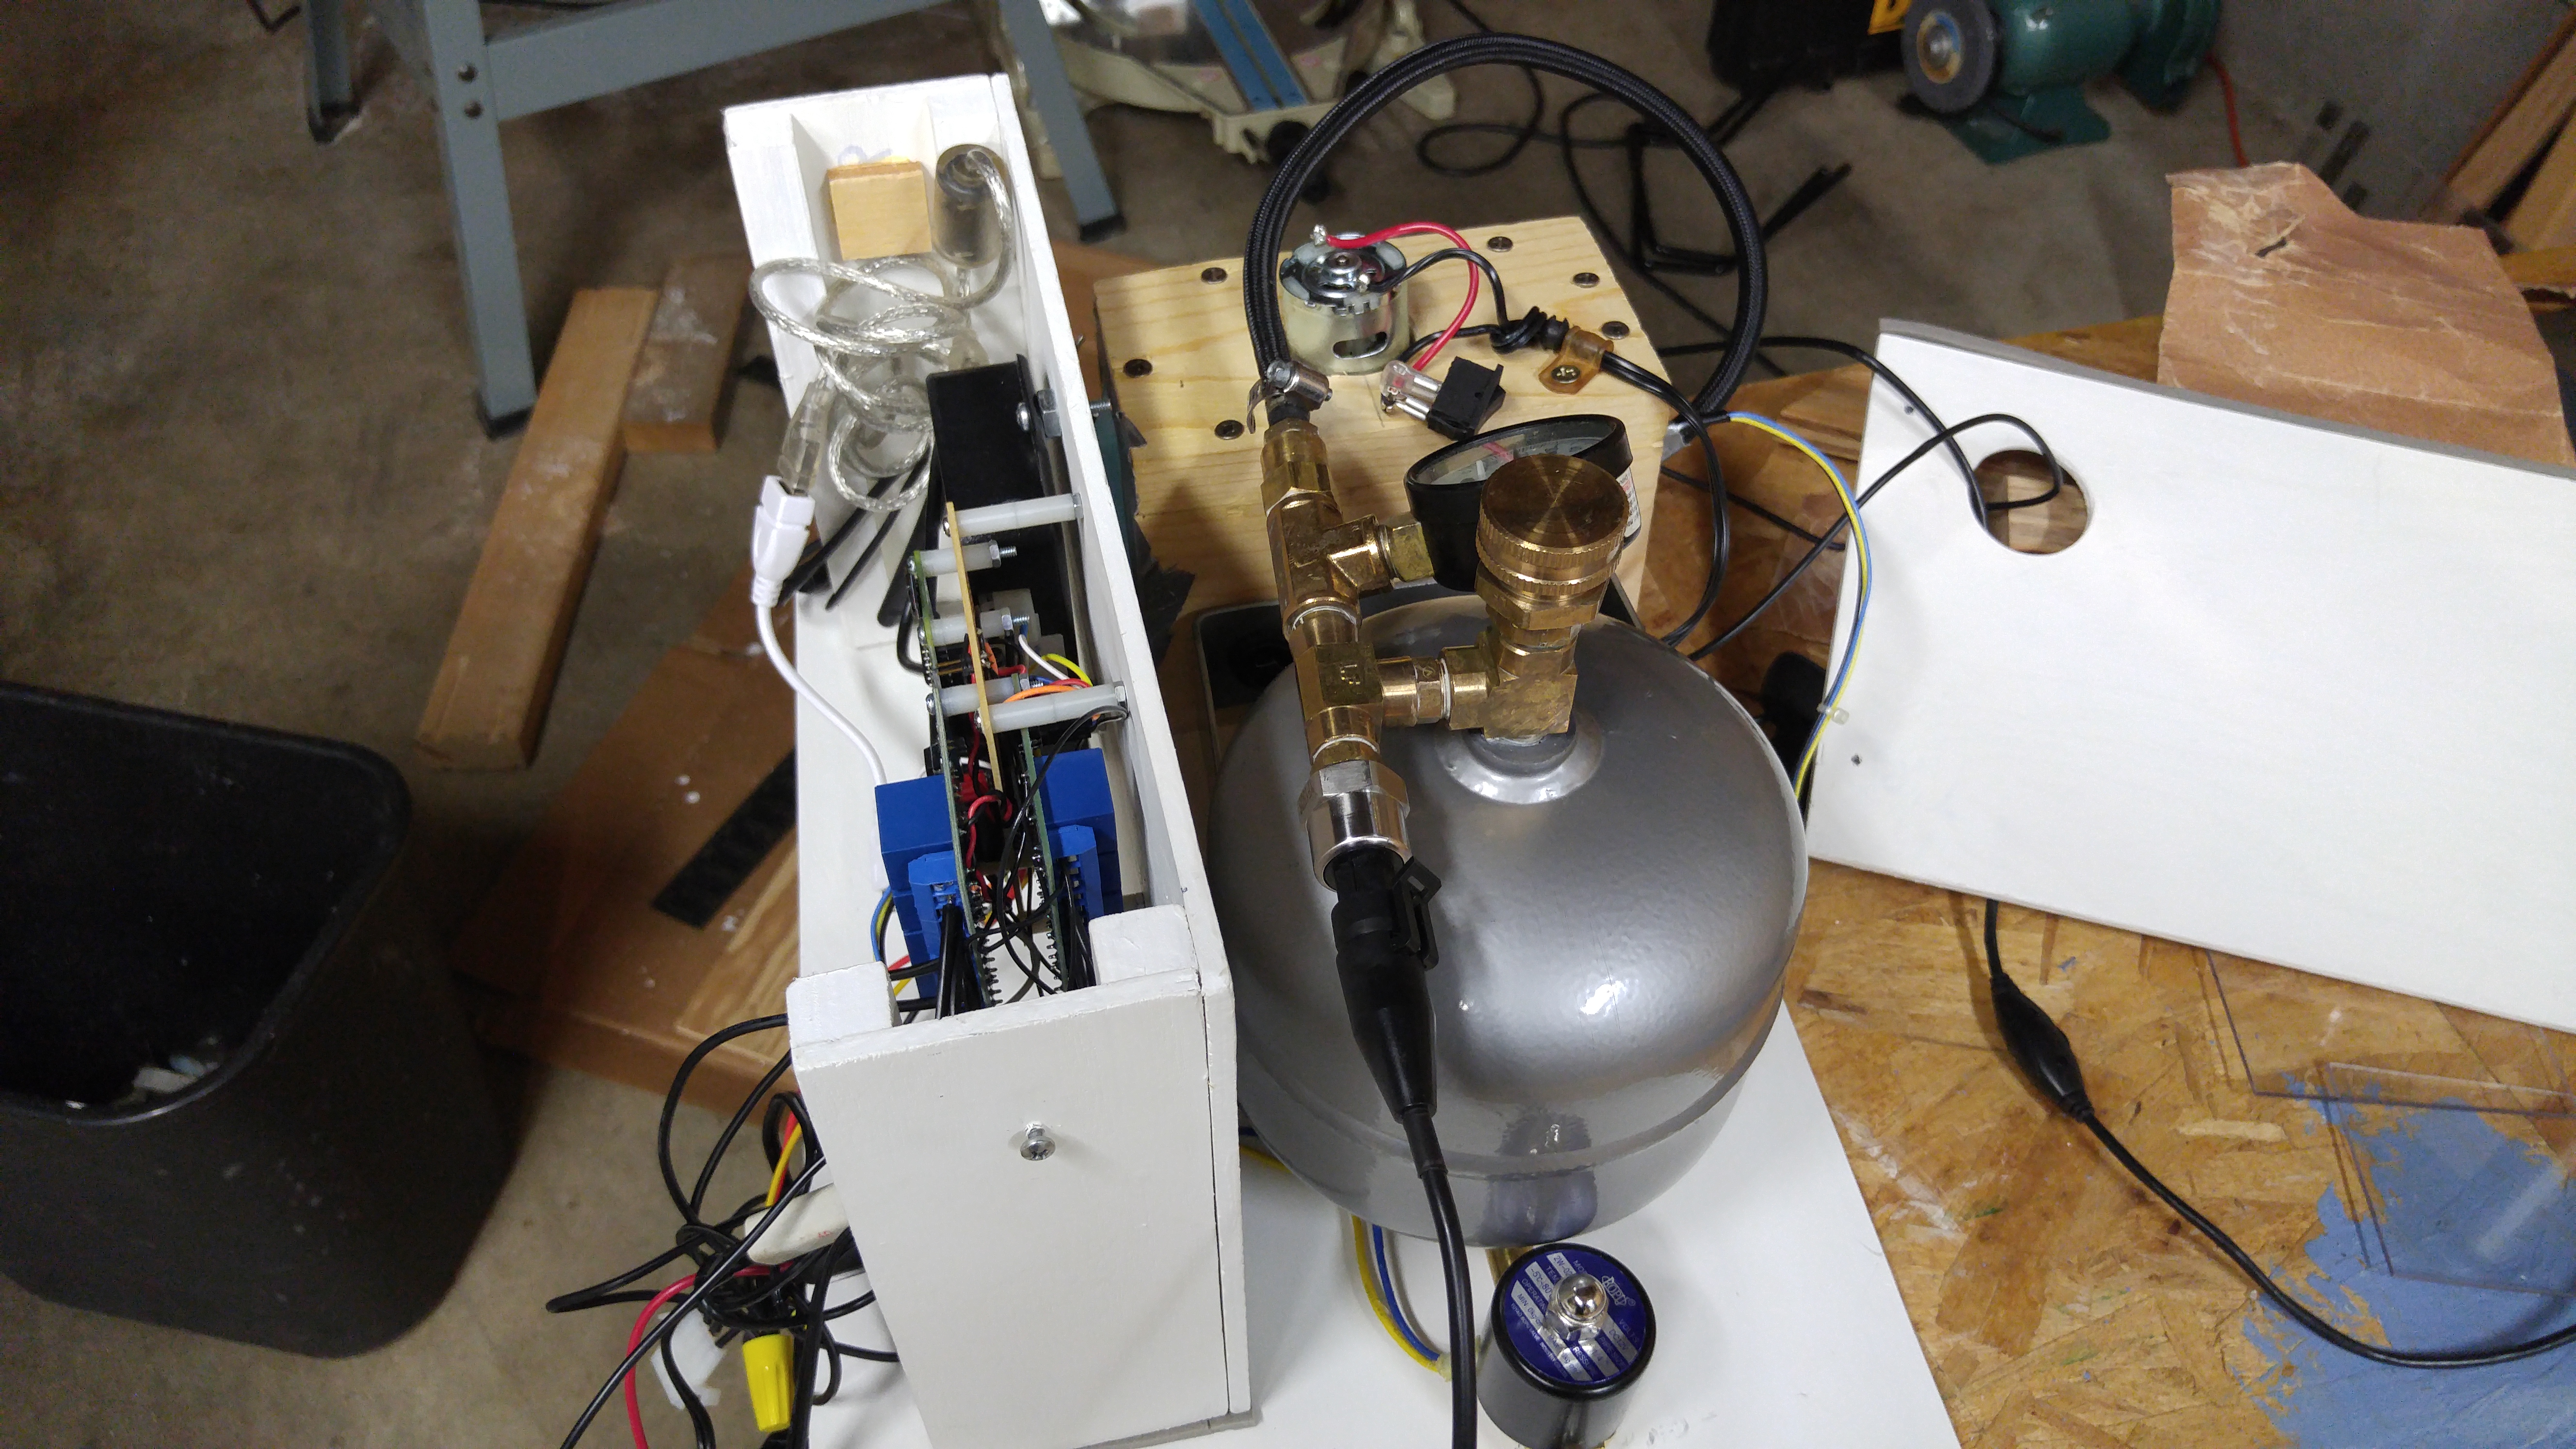 Gun assy nearing completion
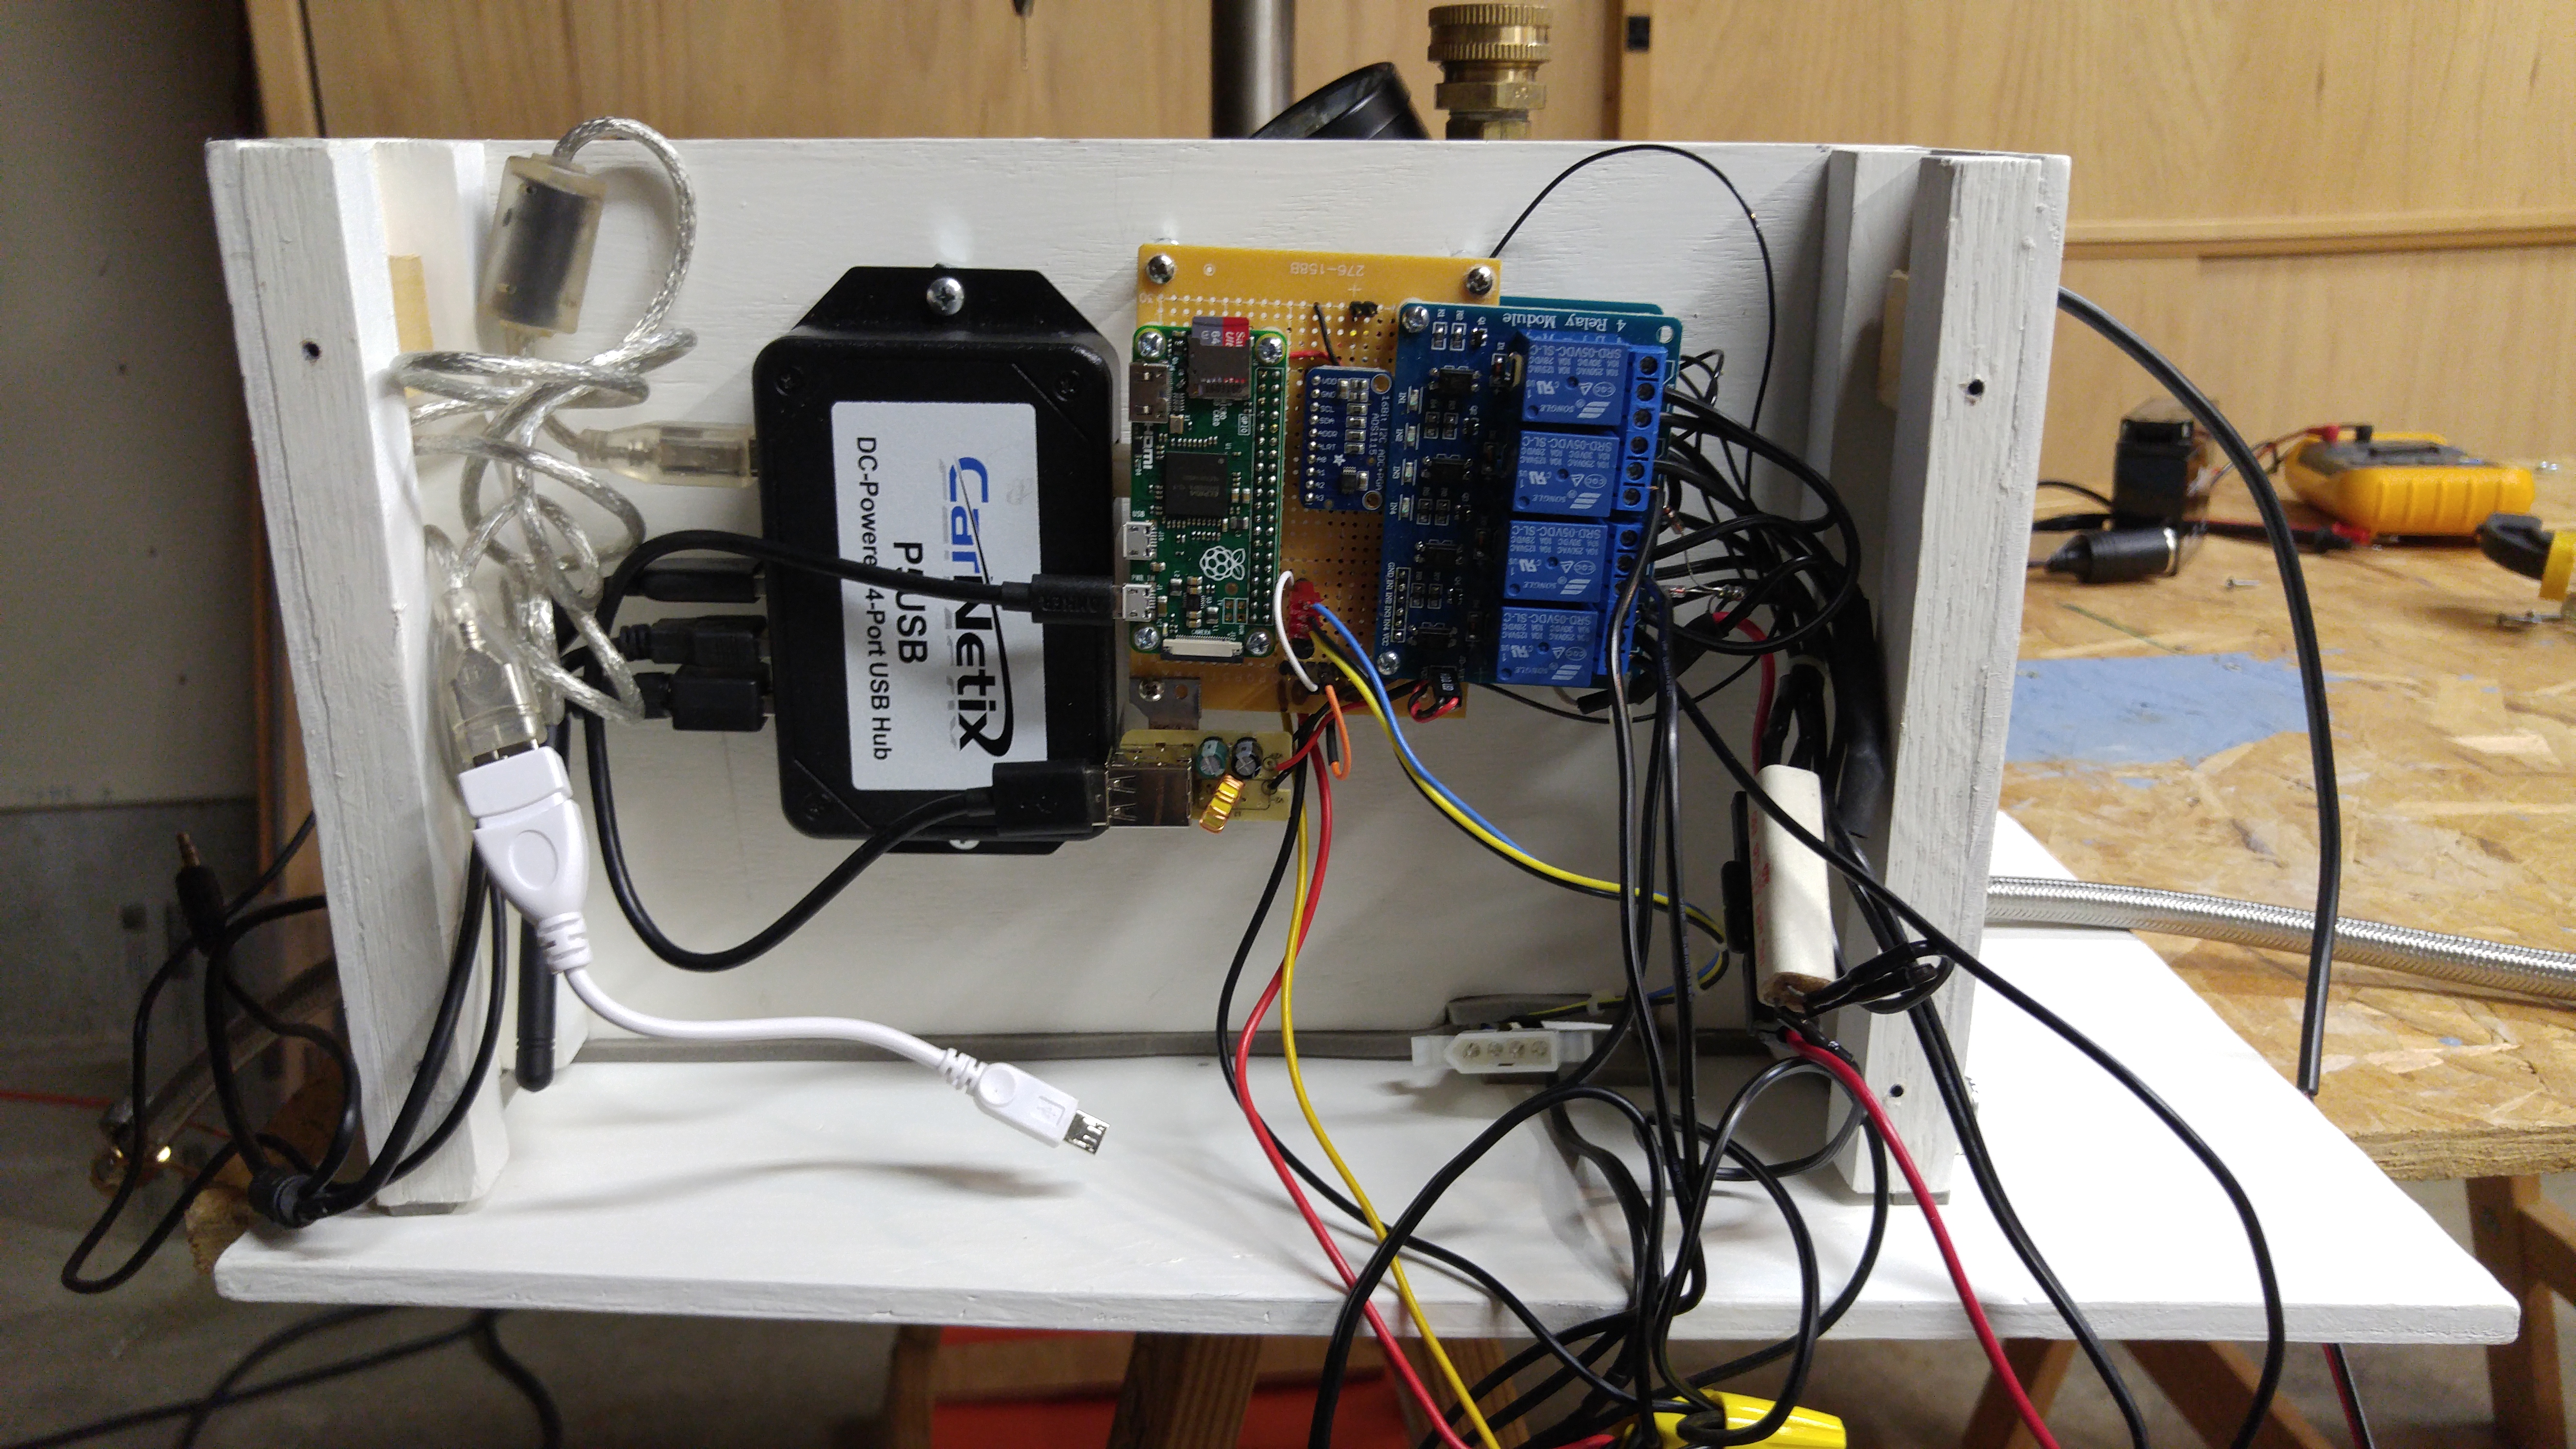 Electronix box showing (L to R) 12V powered USB hub where WiFi dongle and 2 cameras connect to Pi, the Pi, Adafruit ADC, 8 relay assy, current shunts
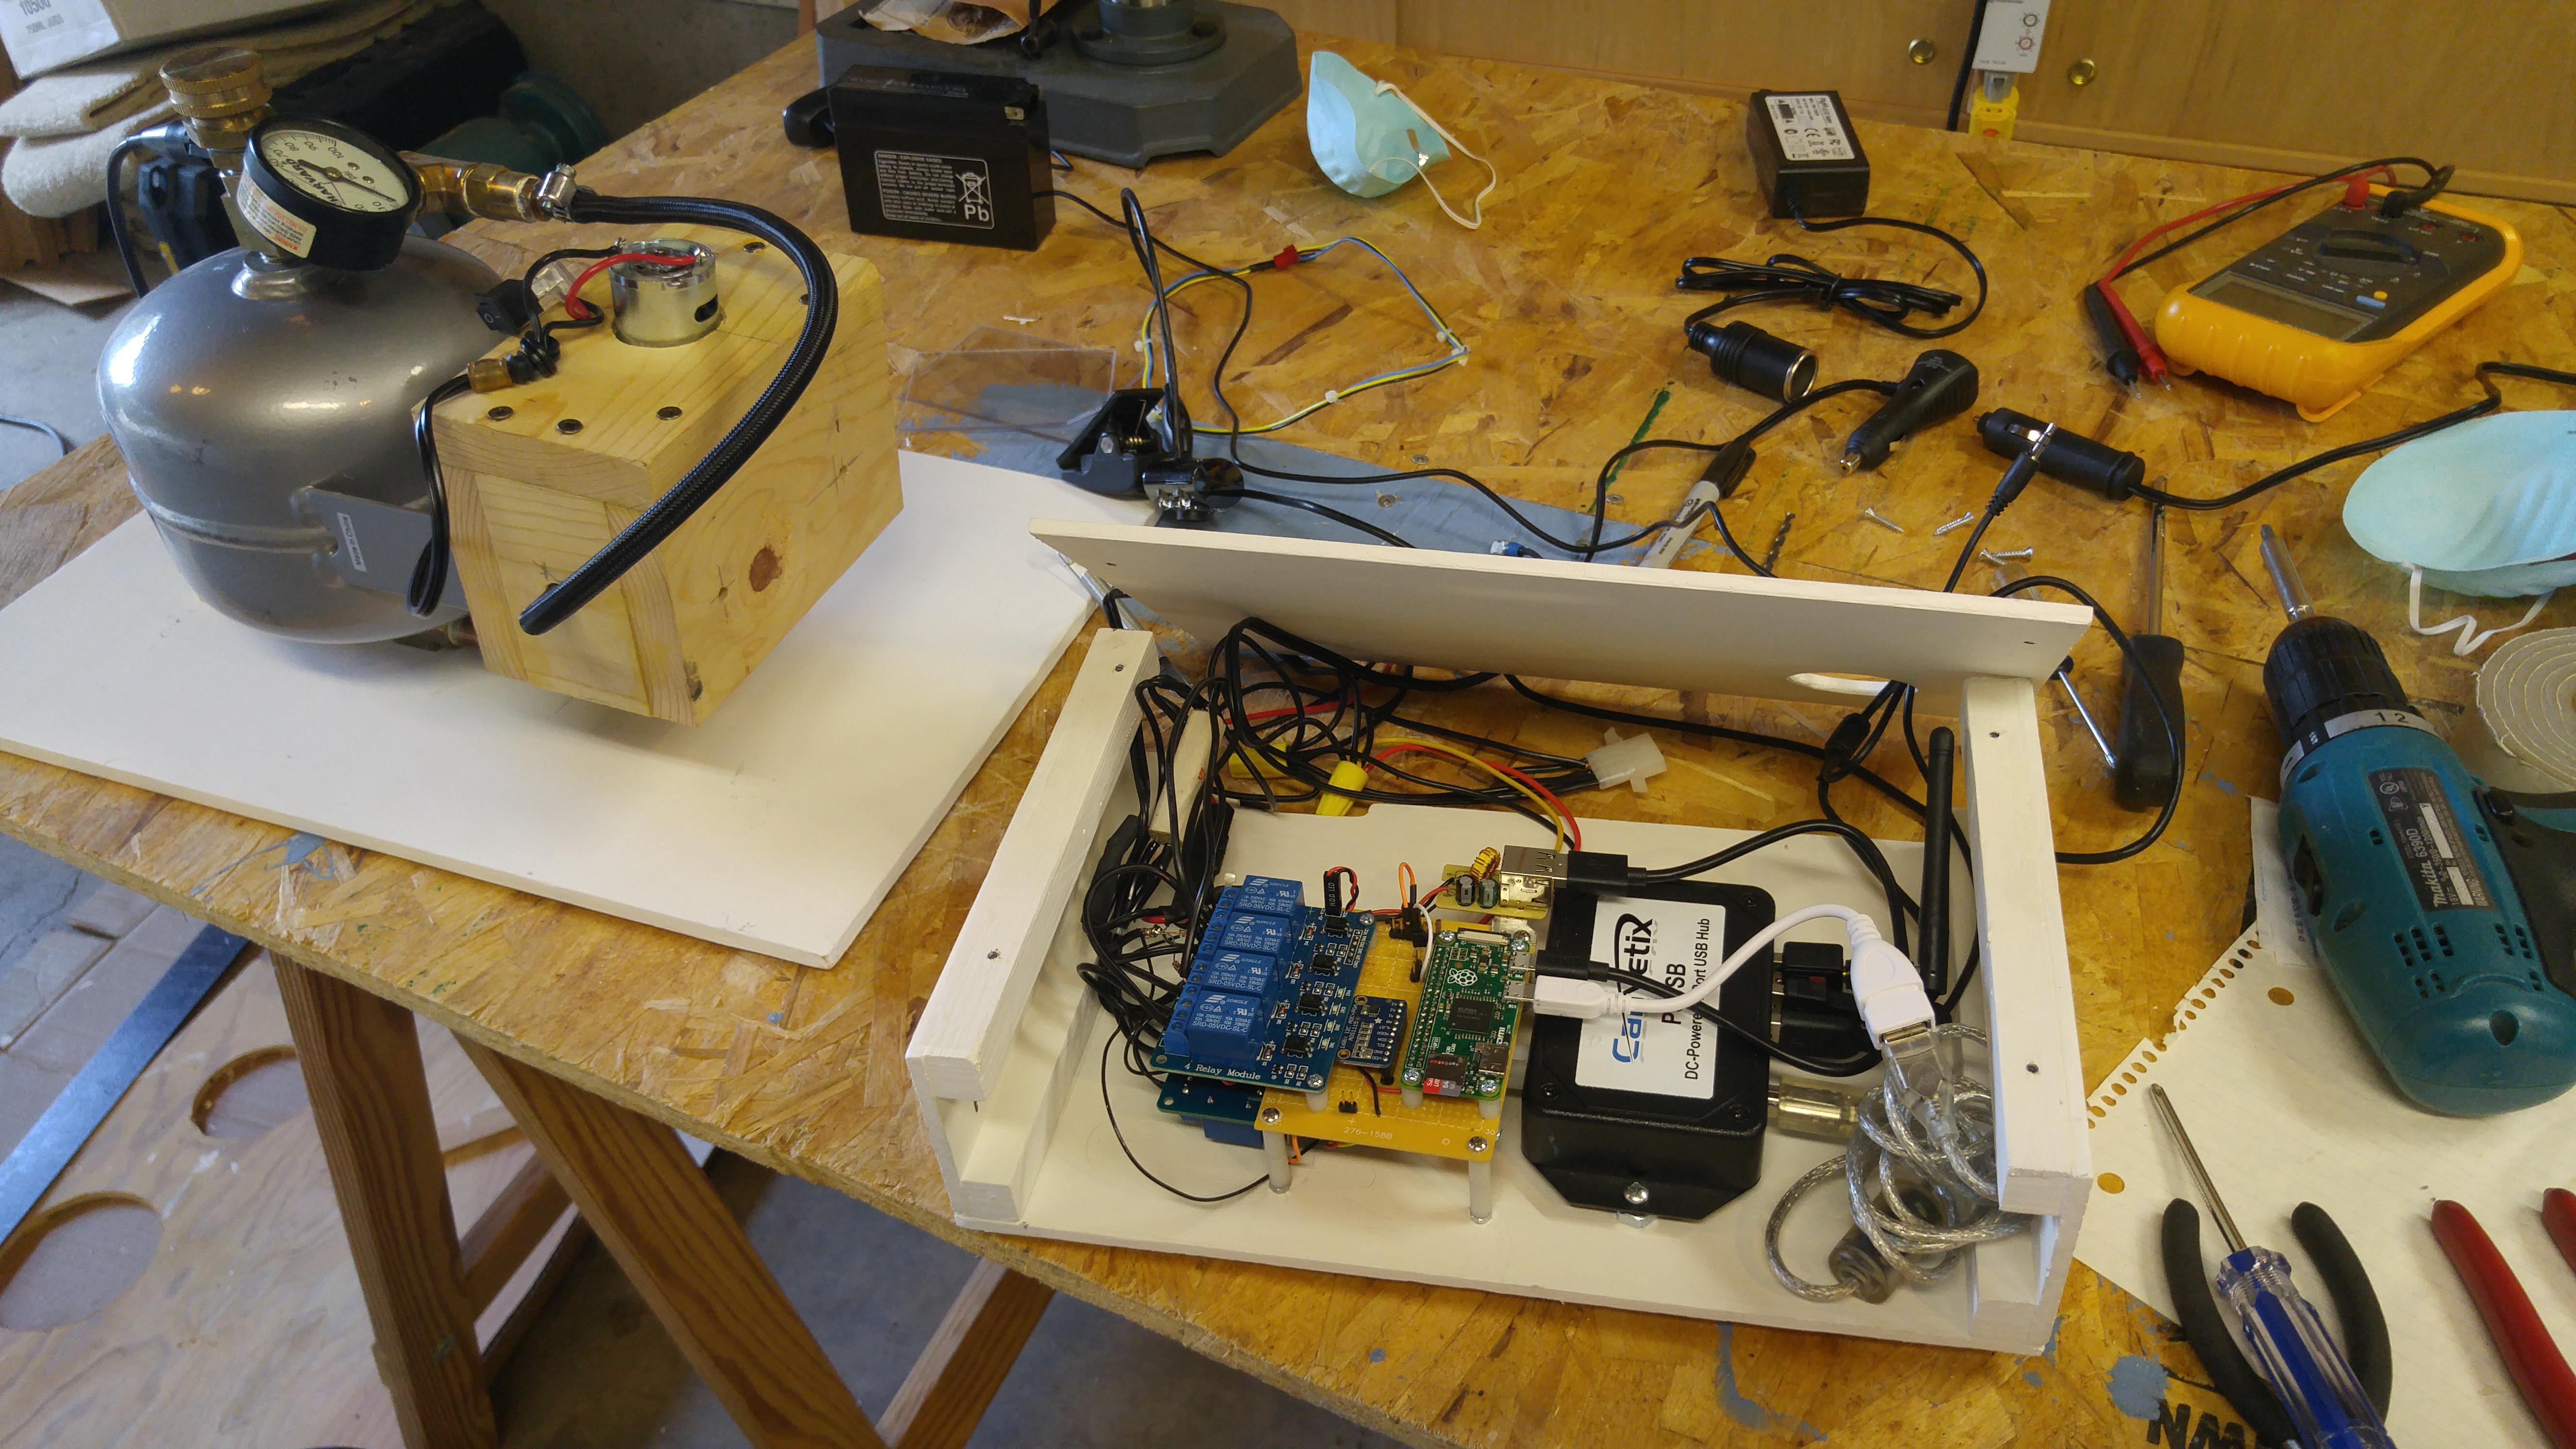 Electronix box being assembled next to compressor/tank/valve assy
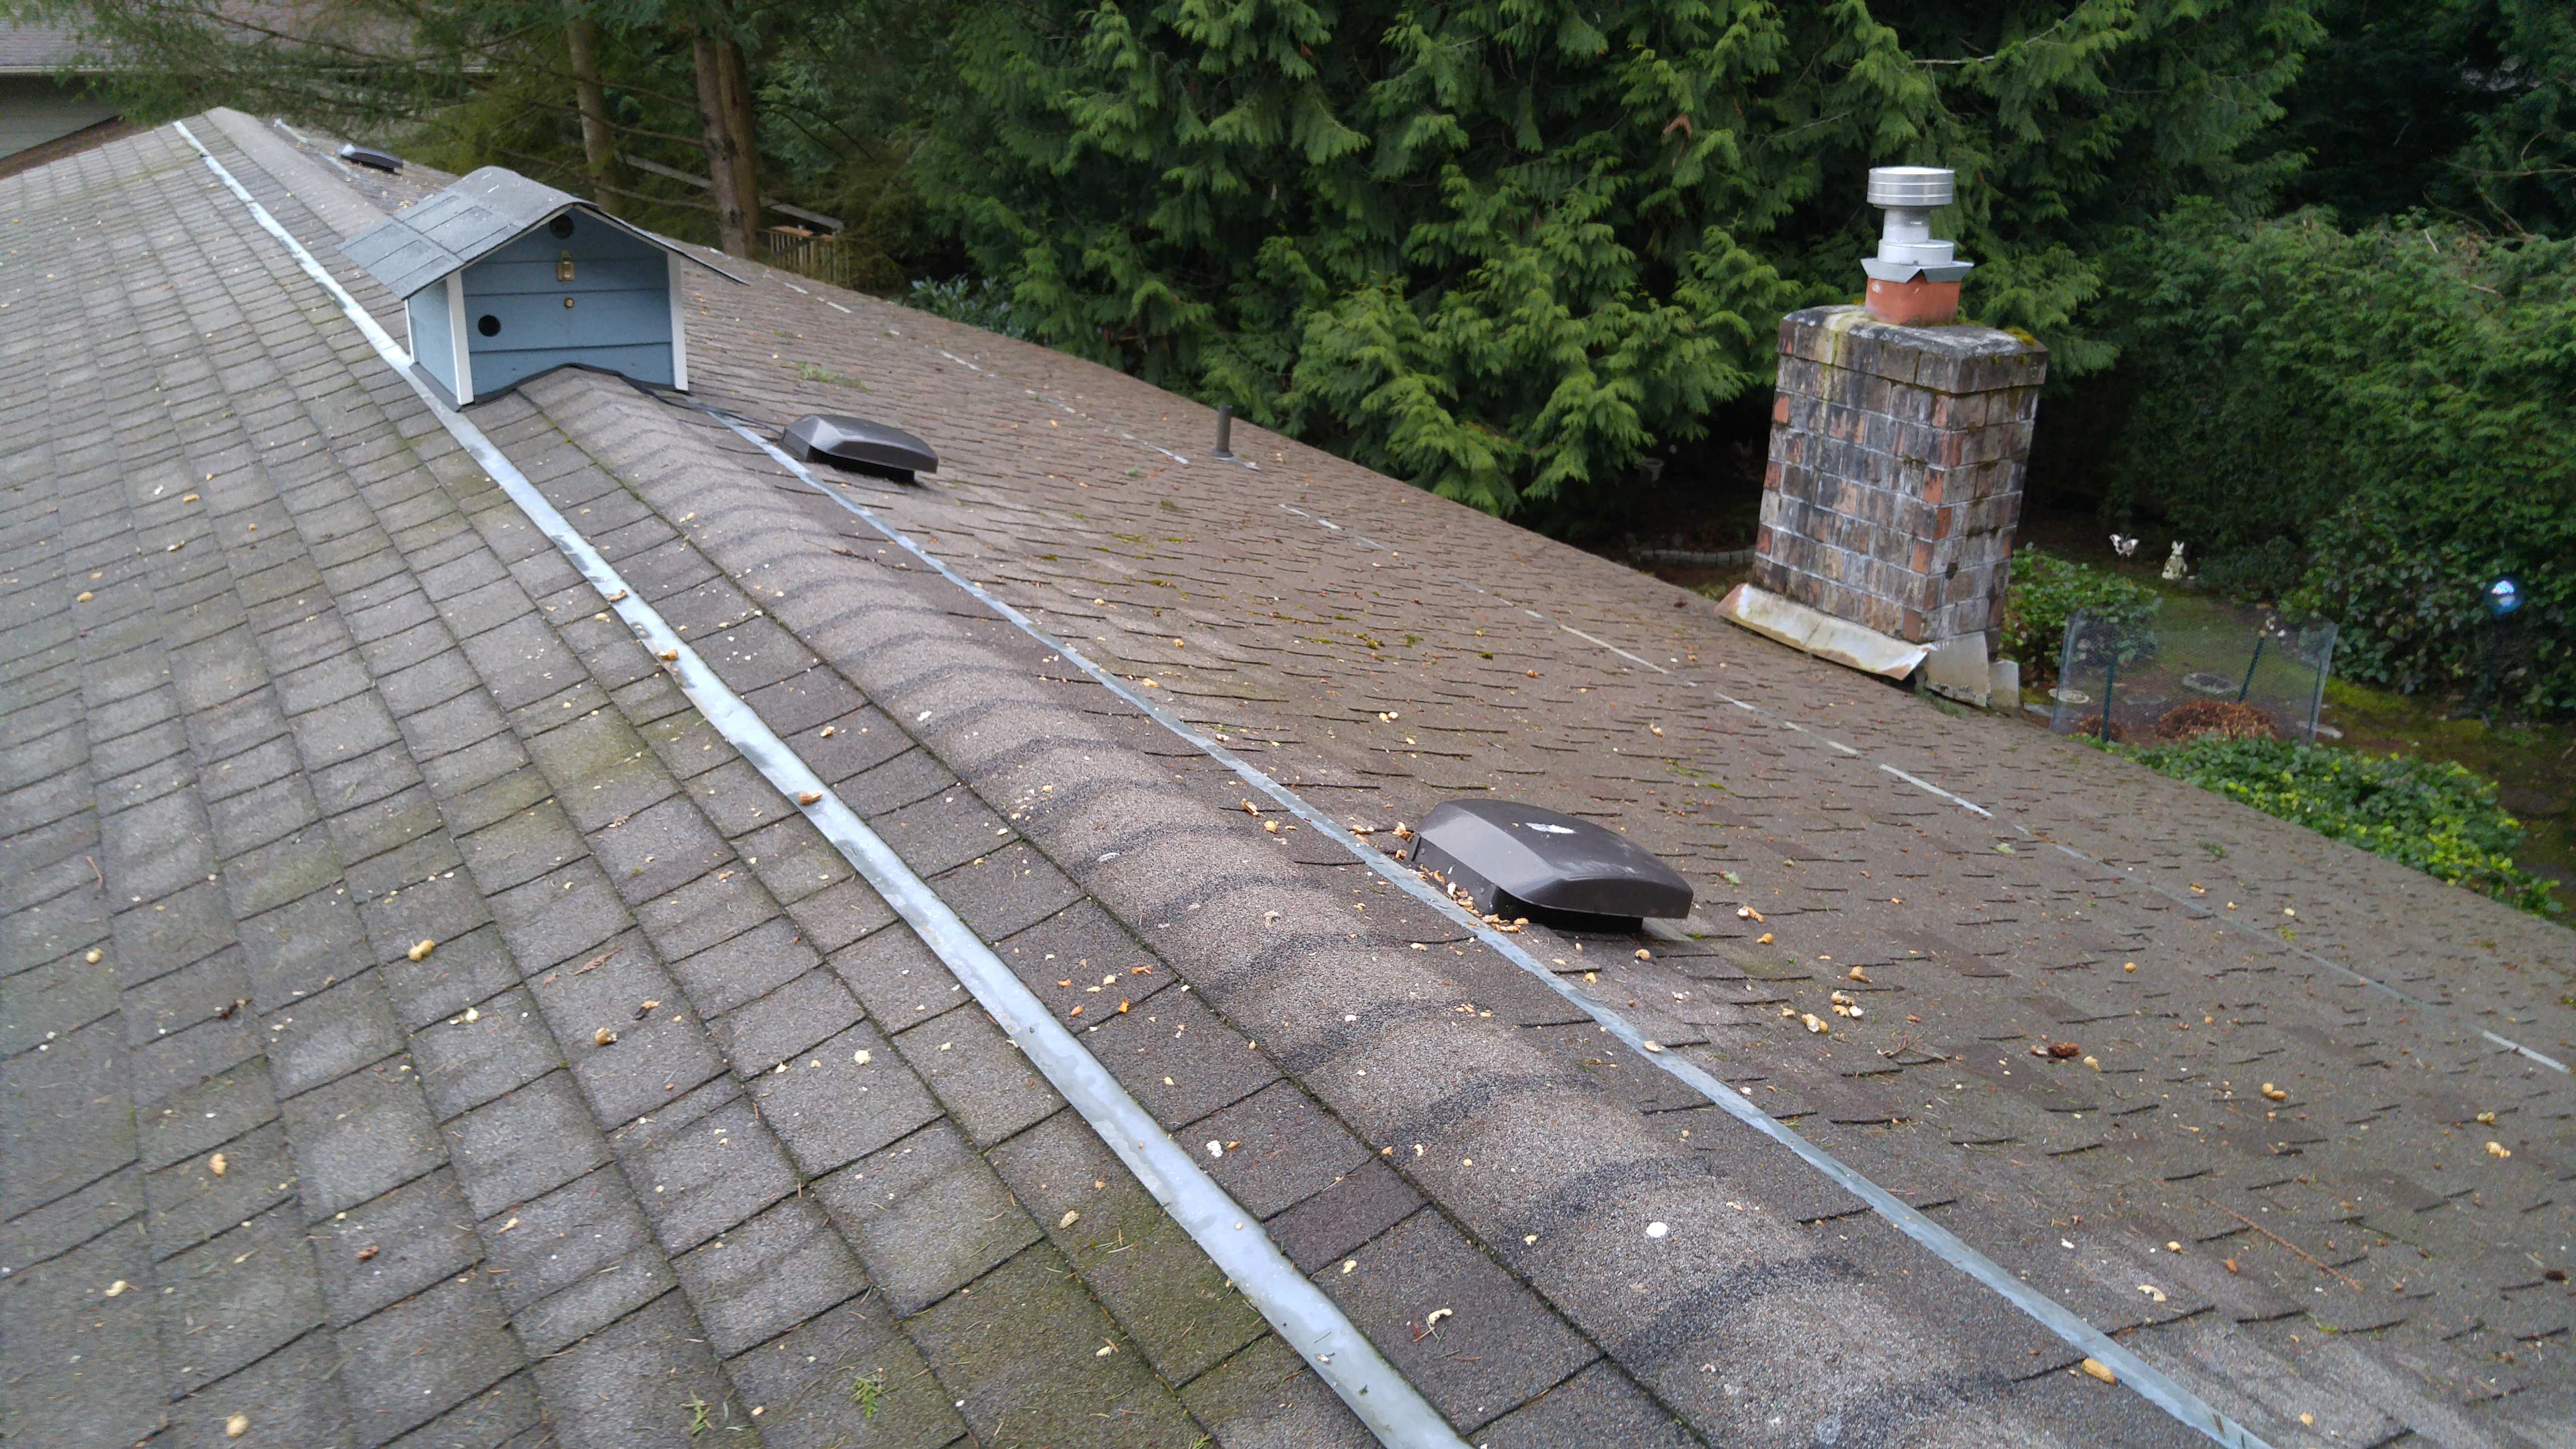 Peanut shells, everywhere!